
I’m in the process of moving blog posts from my old site to my new one. This blog post was originally published on May 29th, 2019
A lot of you probably already know what a "zine" is- they're small magazines that are usually self-published by independent artist and authors. A zine can be made about any topic under the sun, so they're a great outlet for creativity and expressing your most recent interest in a real, tangible object.
Ideas for zine topics:
Photos and stories from a recent trip you took
Advice
Poetry
A short story or comic
History of a niche subject that you're interested in
Anything else you can think up!
My main purpose for this new blog is to share things I know about with you guys, and that's just what I'll be doing in today's post! I've always been someone who learns best when I teach myself things, whether that be through a library book, YouTube tutorial, or helpful blog post (like this one hopefully will be!). When I was trying to create my first zine (Just Be Nice!), however, I had some difficulty trying to figure out the best way to arrange the pages in a document. I created a Google Doc for you to try and make it easier for any future zine makers- making zines is so much fun- if you make one or have made one in the past, please share it with me (Instagram: @enchantedquill), I would love to see it!
Link to Google Drive folder with zine templates
In this tutorial, I'll be sharing how you can use this simple template to create a zine, and how to print it. You should know, however, that printing will take some trial and error, and you may have to adjust margins or image sizes in order for your zine to print perfectly and line up correctly front and back. For this reason, I would recommend printing your "experimental" copies in black and white as opposed to colored ink.
Let's get started! This tutorial will show you how to make an 8-page zine, which uses 1 regular sheet of printer paper (front and back) to print.
The first step is to decide how you would like to create your zine. In my case, I usually will use a digital platform, like the apps Phonto and Procreate on my iPad. You could also use Word, Publisher, or Google Docs. Additionally, I created my first zines on regular old printer paper with markers, paint, and colored pencils then scanned them in. If you choose to go this route and you don't have a real scanner, I've had good luck with the app CamScanner for iPhone, although it does require some patience to get the lighting right in order for the image to appear like a real scan.
Try to leave a bit of a border around each page, just to prevent printing issues. Images and text that go all the way to the edge tend to get cut off.
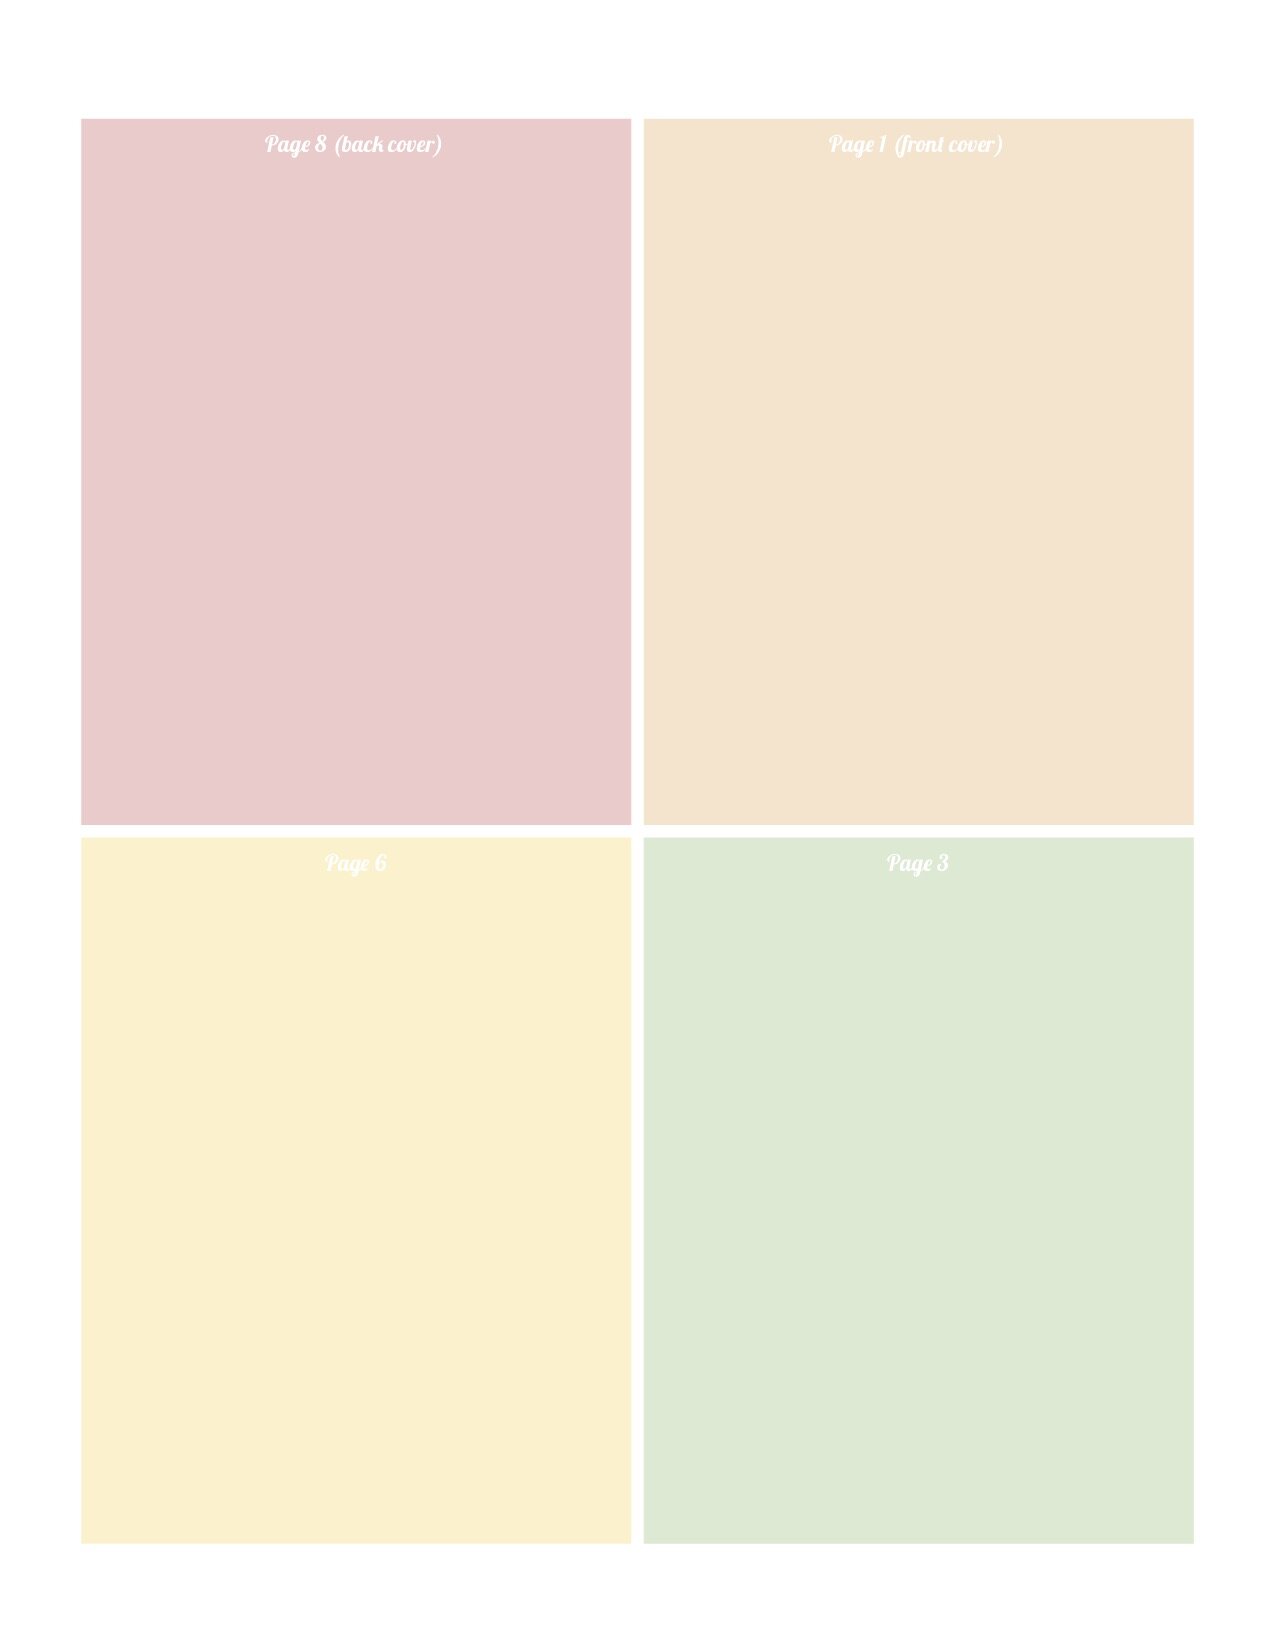
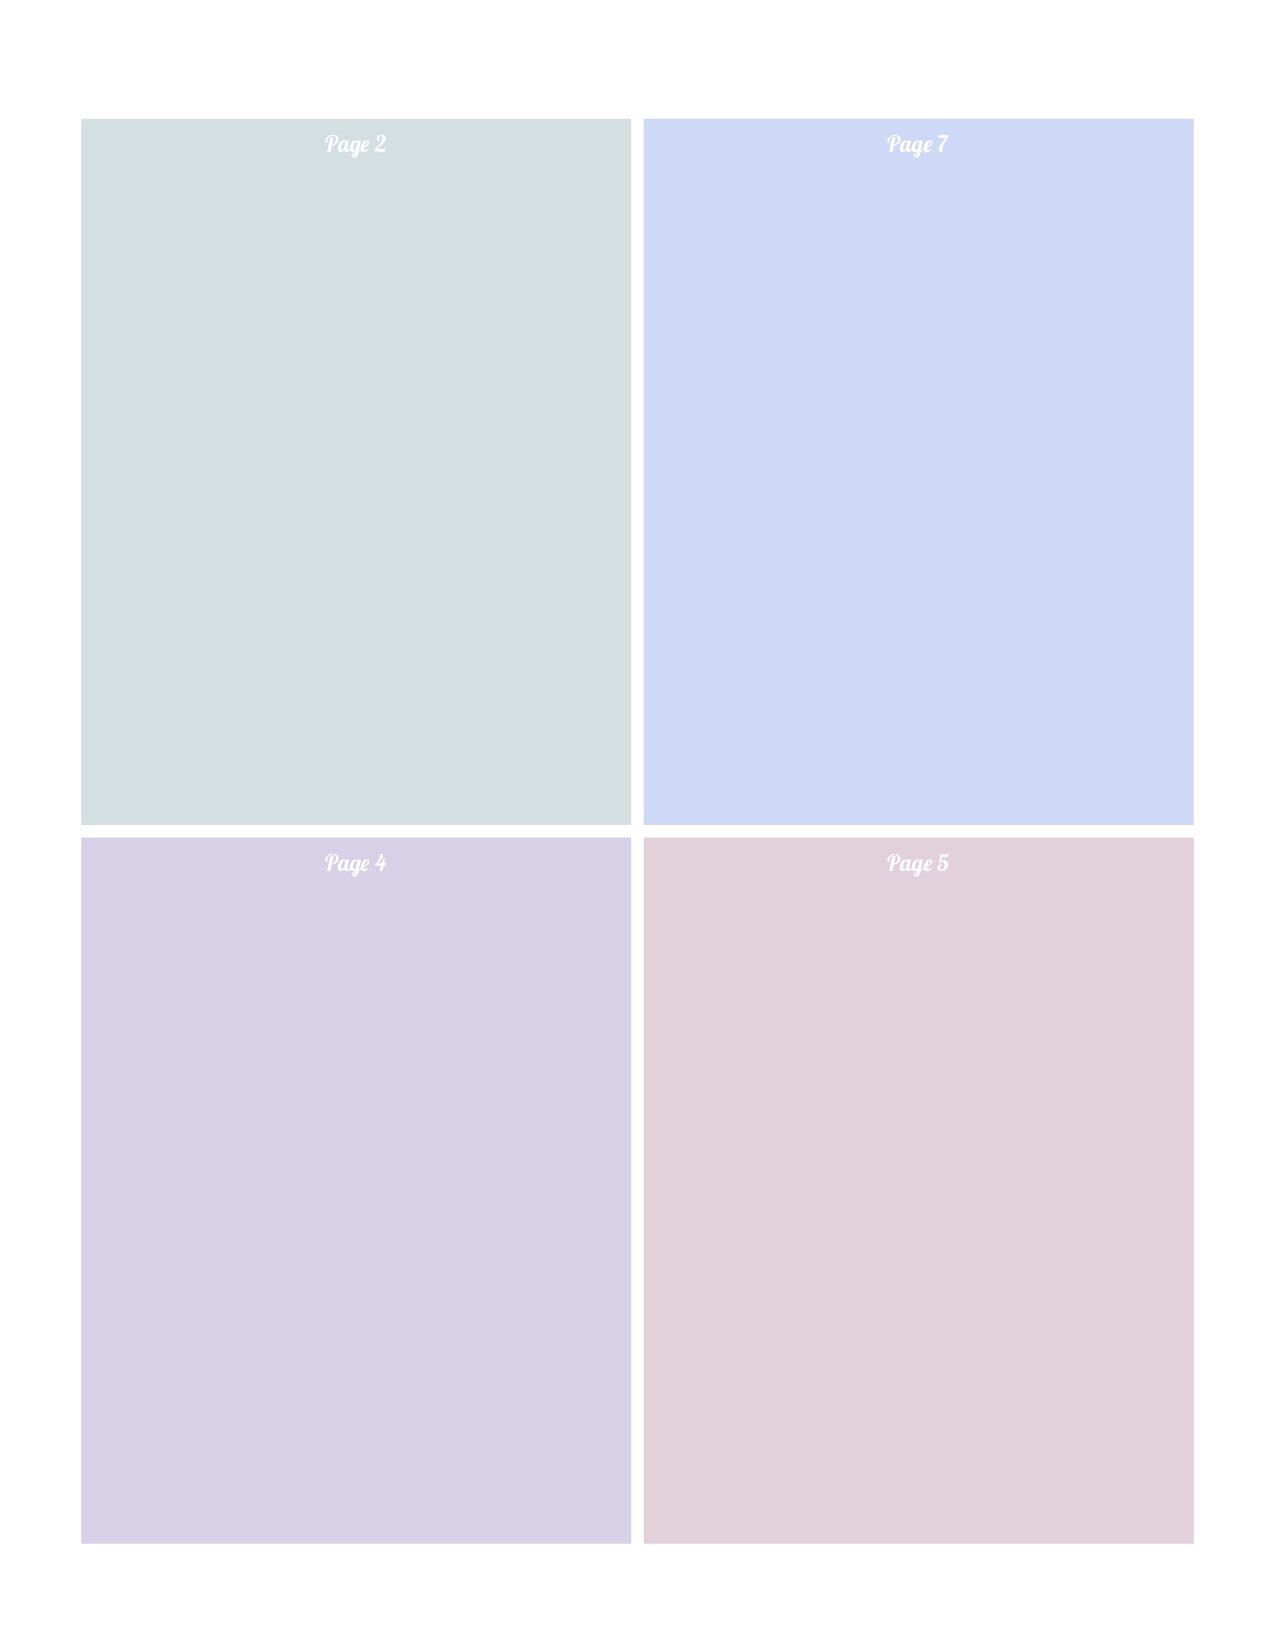
The most important thing to remember when creating your pages is to keep each individual page in the ratio of an 8.5 by 11-inch sheet of paper. This is the size my template is designed to work with, and it's important that you keep them this size for your zine to print properly. The template is made to print 4 8.5 by 11-inch pages per sheet, so each page turns out to be a quarter of the size of a regular sheet of paper. However, you can make each of the eight (total) pages 8.5 by 11 inches each, and shrink them down to the quarter-sheet size once you import the image to the template. This will allow for higher-quality images.
If you're going the digital route and are using a program that measures pages in pixels, try using 850 by 1100 pixels for each of your 8 pages.
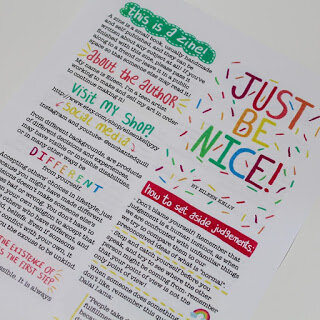
Once you've created each page, save them as image files, like JPEGs or PNGs. Some programs will allow you to save them directly as this file type, on other programs you may need to take a screenshot and crop it. Then, you can use the template and a free online image editor (I recommend BeFunky, and that's what I'll be using in this tutorial, but you can use another if you prefer) to assemble your pages. Additionally, I would open up the site in two different tabs- one for the front template and one for the back. This will allow you to make changes to both throughout the process without having to start over. I'm using the pages of my Just Be Nice! zine here. I heavily utilized the line guides on BeFunky when designing mine- it made it really easy.


(I love how you can see my open tab where I've Googled how to screenshot in these two images- we're definitely computer experts around here.)

I started by inserting the first template and the four pages that belong on the front (pages ). I then dragged each of the four pages onto the template, trying to get them as close to the edges as possible. Don't worry if they go outside the borders a little on the outer edges, just make sure they line up on the edges that are bordered by the other pages to prevent printing errors. Once you've got it to your satisfaction, save the image and print your first trial!

You may have to go back and adjust your original layout depending on how well you lined it up, but this method is pretty foolproof- it should only take you one or two edits. Once you've got it, it's time to print the back. Printing the back is almost identical to printing the front- you just use the "back" template and insert the appropriate pages. The hard part is figuring out how to insert your front image back into your printer in order for the back to line up correctly. When you've done it properly, the cover of your zine should show the first page on it's back.
A quick note- if you feel that the margins are too large on your printed sheet, you can always drag the outer corners of each image to fill the page more. Just be sure to print lots of tests to be sure nothing gets cut off- each printer is different!
Once you've printed a successful copy of your zine, it's time to try assembling it! You may find that you need to go back and make a few adjustments at this phase as well, but don't get discouraged! We're almost done! :)


Fold your page in half "hamburger style", and line up the edges as closely as possible. Score the crease with a fingernail or a credit card, and then cut very carefully along the fold. You could also use a paper cutter for this if you have one, but scissors work just as well. Fold your zine so it's ordered appropriately, and we're almost done! I trimmed some of the blank white margins off my zine before moving onto the next step.

The last step is to bind your zine. The easiest way is to just staple it, but I usually sew mine to add a little extra dimension and make them sturdier. I use a sewing machine, but you could also hand-sew it. Here's a simple tutorial (not my own) if you've never sewn before- all you need is a needle and some thread.
Now your zine is done! Pass it around to your friends, tape it on a lamppost in a public place to share it, or tuck it in a library book! I love to send them to my penpals, as well as sell them in my Etsy shop!
I hope you enjoyed this tutorial, please do let me know if you have any questions or comments, and be sure to send me pictures of your own zines!
Thank you for reading, see you again soon!
Your friend,
-Eileen
@enchantedquill